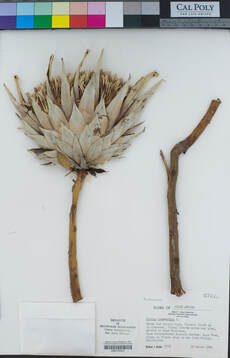
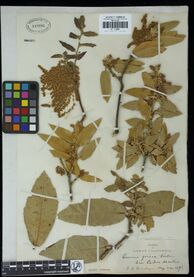
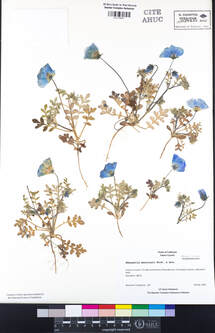
As you peruse the ever-increasing gallery of herbarium specimens on our portal (cch2.org), you might be struck with an obvious question: how do you mount a dried plant specimen to a sheet of paper? For some plants, the answer seems obvious, but not all plants squish flat in a plant press. What about things like cacti...and whatever this is?
(For the record, this is a Protea, native to South Africa and cultivated in California).
After being collected, pressed, and dried, plant specimens are mounted to sheets of sturdy, acid-free paper using several methods, each with advantages and disadvantages. In early years of herbarium history, the primary method of mounting herbarium specimens was to hand-sew them to the paper. (Yes, that means getting out your needle, linen thread, and a thimble). This method is still used in many herbaria, especially for bulky items like fruits and cones, because of its durability and the fact that it introduces few additional chemicals or adhesives to the specimen. Nevertheless, as you can imagine, sewing is no quick and easy task.
| A slightly less labor-intensive mounting method is using linen mounting strips. In pictures, these often look like pieces of white tape affixing the plant to the paper. In reality, this "tape" is archival-quality linen treated with an adhesive on one side that becomes sticky when wetted. Using strips to mount plants is not always quick, but it protects the plants' DNA and allows future users to manipulate plant parts more easily. |
| Archival quality glue is also widely used to mount specimens, often in tandem with one of the other methods described above. The person mounting the specimen brushes, blots, or otherwise spreads the glue on one surface of the specimen (sometimes by dipping the specimen in a glue puddle) and carefully arranges the specimen on paper. Before letting the glue dry, the mounter must weigh down the specimen to ensure tight gluing, often by covering the specimen with wax paper and placing a weight or several weights on top. The result is―hopefully―a neatly and securely affixed specimen that lasts for hundreds of years. A skilled mounter can produce a specimen with little evidence of the adhesive; however, glue can also be messy and can complicate DNA extraction from plant tissues. |
There are other ways that plants have occasionally been mounted in a pinch, including with cellophane tape and plastic wrap, but these do not produce lasting, archival-quality specimens, so they are often re-mounted when they are discovered.
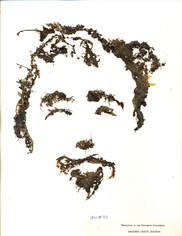
Regardless of the adhesive used, mounting specimens is a blend of science and art. Important structures such as flowers and fruits must be clearly displayed for identification and measurement, leaves must be splayed out to show their full shapes, and there must be room on the specimen for the data-rich label and future annotations. At the same time, well-mounted specimens can embody the life and beauty of the plants they display, and most mounters work hard to produce specimens of high aesthetic quality. Some are more creative than others (see the arrangement of the aquatic plant shown below!), but all resulting specimens are vital snapshots of plant diversity in space and time.
Regardless of the adhesive used, mounting specimens is a blend of science and art. Important structures such as flowers and fruits must be clearly displayed for identification and measurement, leaves must be splayed out to show their full shapes, and there must be room on the specimen for the data-rich label and future annotations. At the same time, well-mounted specimens can embody the life and beauty of the plants they display, and most mounters work hard to produce specimens of high aesthetic quality. Some are more creative than others (see the arrangement of the aquatic plant shown below!), but all resulting specimens are vital snapshots of plant diversity in space and time.
For more information about how plant specimens are mounted, see these resources:


